Navigation 2
- right_en
- rightlower_en


A telescope is not a must on the list when acquiring equipment for teaching physics. Due to a scarce yearly budget most schools cannot afford to buy one. Some schools have been lucky enough to get a telescope as a donation from local organizations. An excursion to the nearest observatory or a planetarium may be a fair alternative to a telescope. Before starting the observation, it is useful to make the device familiar by using literature and the Internet. The functional basis of a telescope is quite easy to illustrate by using simple diagrams. A simple mini model of a telescope is easy to prepare by using cheap materials (picture IH, Finland).
Aim: To prepare a simple mini-size ready-to-use telescope using existing materials at school and small lenses.
Explorations: At first get to know the functional principle of a telescope and image formation, i.e. how we see what we see. Discuss various telescope models. Using pictures and diagrams get to know the construction and the functioning principle of Galilei’s and Kepler’s telescopes. Discuss the origins of a telescope as well as observation methods and circumstances at the time. The mini-sized telescope prepared during the lessons will be made in teams of two according to the principles by Kepler. Use common craft materials.
1) Sketch on paper the construction of the Kepler telescope as a cross section. Make sure that the students understand its functional principle. Discuss the materials used.
2) Acquisition of lenses may prove to be difficult. Specialized shops selling components and construction materials to DIY enthusiasts may have objective lenses in their assortments. Lenses can also be on sale in photo shops. A search on the Internet may produce names of foreign specialized shops and their contact information. Ordering from there may be a little more expensive but the series of lenses the school has bought may, for economic reasons, be used many times.
Diametre of the objective is about 3-5 cm. Diametre of the eyepiece may be small, e.g. 1 cm. However, using this combination of measures may cause the size of the object to be seen as quite small. Eyepieces may be found in single use cameras. The photo shops are only glad to hand out a plastic bag full of disposable single use cameras. Be careful when removing the lens in order to avoid electric shocks from the surfaces that still may have electric charge.
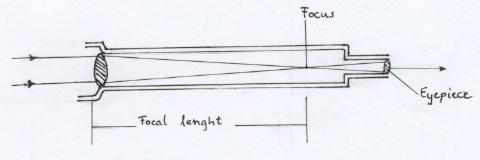
3) Make first both tubes of which one can be pushed inside the other. The diametre of the first one is the same as that of the objective and the diametre of the other is a little bigger than that of the eyepiece. Use a candle to determine the focal-lengths of the lenses. That gives a clue for how long the tubes should be. This calculation is not very accurate since the eyepiece tube is made mobile so that sharpness of the picture can be adjusted. A sketch in the picture introduces Kepler’s principle of a telescope (picture VH, Finland).
Inside the big tube fix at first cardboard strips curved to waves parallel to axis of the tube. They are supposed to direct the eyepiece tube. It is difficult to foresee the precise heights of the waves but the form of a wave makes it possible to flatten or heighten the curves of the strips as much as needed. It is worthwhile to use self-adhesive fasteners when affixing objective to cardboard before the cardboard is rolled to a tight tube and the seam is glued. Do the same activity with the eyepiece tube but note that the fixing of the lens is different. Since the lens is small, no self-adhesive fasteners may be used. Fix the lens on cardboard a little larger than the diametre of the lens on the hole made in the middle of the cardboard. Bend some strips from the edges of cardboard and glue them to a tube that has been rolled to the size of the cardboard diametre. At the eyepiece end of the objective tube glue a circle cardboard in the middle of which there is a hole. Its size is the same as the diametre of the eyepiece. This hole and the curved strips inside the bigger tube together guide the motions of the small tube inside the bigger tube. This is how the sharpness of the picture can be adjusted.
4) Test the completed telescope outdoors. If the preparation has been made during the school hours, i.e. the testing takes place in day light, objects may be landmarks or big things chosen from the school surroundings. Students need constantly to be reminded that on a bright day they must not look straight at the Sun with the naked eye or any device. Instead of that, a picture of the Sun reflected on cardboard or on the ground can be freely explored.
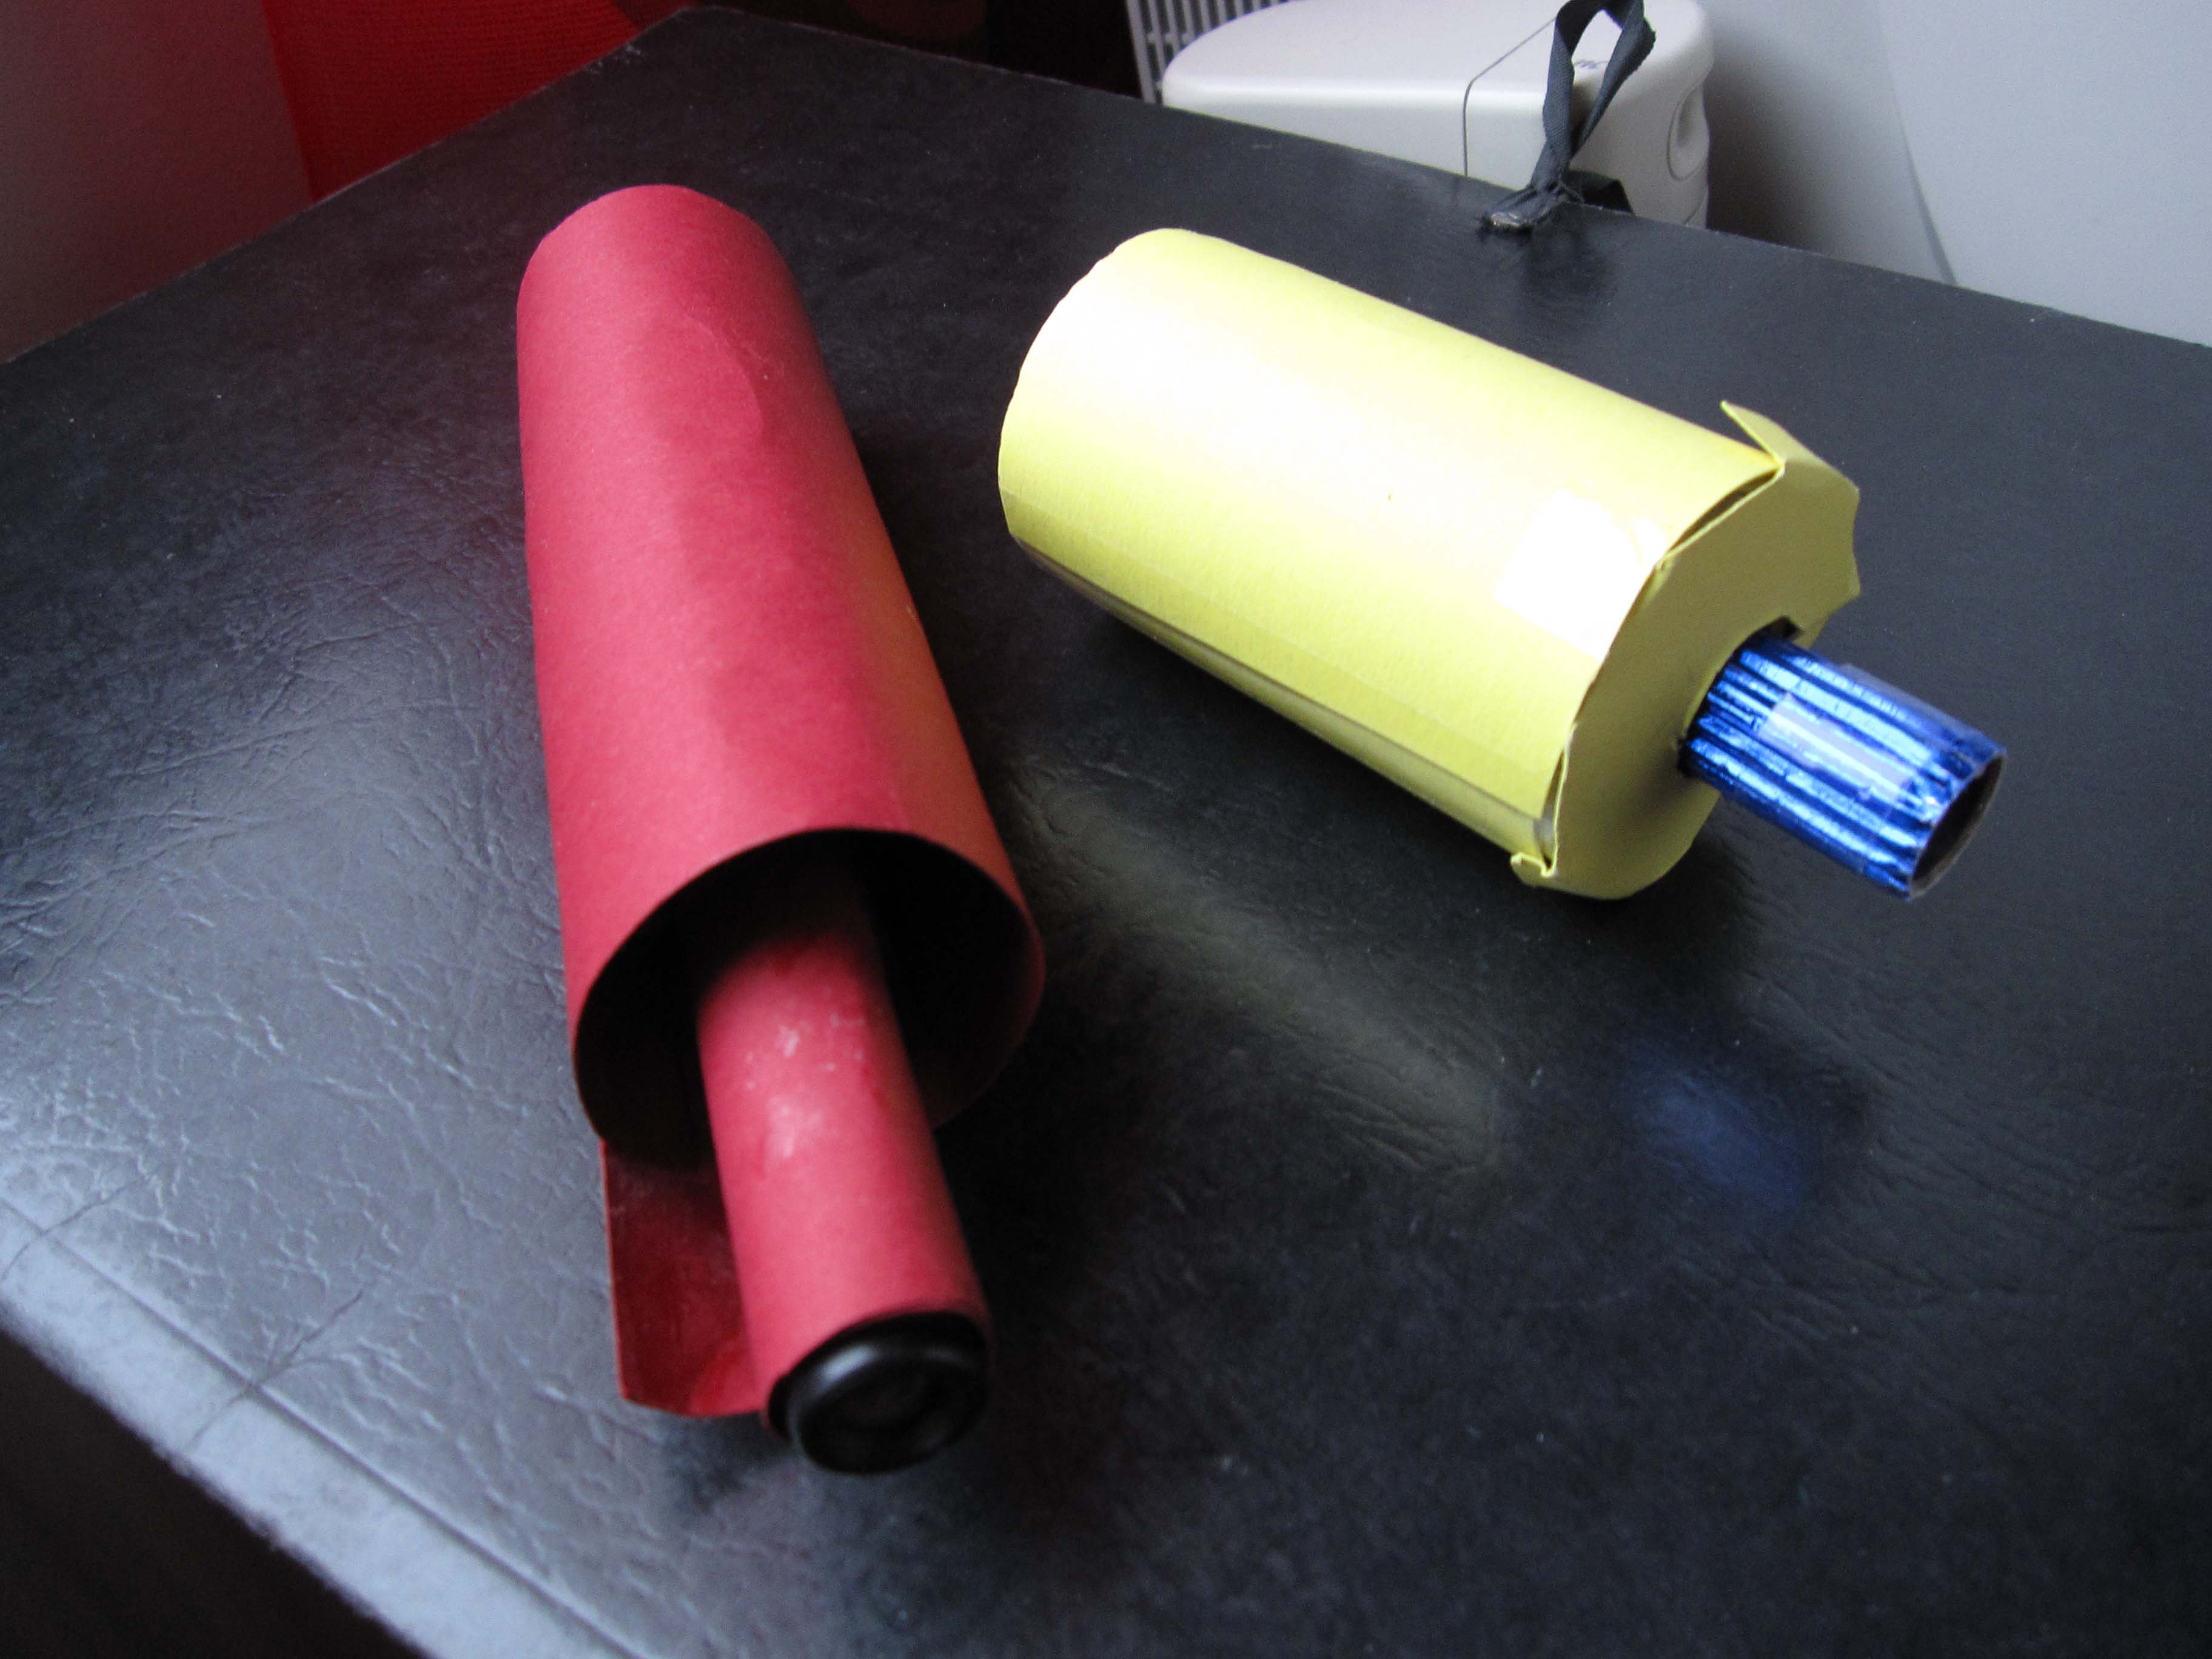
If it is possible, students can come to school in dark evening time and observe by using self-made telescopes. They can also take a mini-size telescope home and observe there in the evening independently or with their friends. In the picture there are two ready-to-use telescopes (picture IH, Finland).

5) * If an objective lens is not available, it is possible to prepare it by oneself. There are instructions for making this kind of a lens in the workshop ARCA Liquid lens. A lens made of strong transparent materials works well. Fixing of it on a cardboard tube needs special arrangements, but the solutions are not too difficult. Best thing to do is to count on the students’ own ideas and inventiveness.
6) *Astrophotography is a good way to test a self-made telescope. Photos may not be excellent but the most important thing is to succeed in saving something by using self-made devices. This task will be even more challenging if the same kind of test is made by using a pinhole camera. In these tests the point is to create ideas for activities, not just to succeed in taking photos. Results of good quality are inspiring bonuses to the students.
Methods: Preparation of an observation tool according to diagrams. Own ideas are also valuable. Testing the product outdoors.
Materials: Lenses in various sizes, either bought or gained free of charge. Ordinary craft materials.
Pondering: How can an ideal interoperability for the combination of lenses be determined in advance? What are the options for preparing a workable mini-size telescope? Would Galilei’s telescope be suitable for this purpose?
Evaluation of the results: Compare telescopes the teams have made. Various solutions, measures used, quality, size and usability of the pictures, etc. Ponder possible suggestions for improvements and their feasibility. Discuss the educational side of the activity.
Hints: If there is an intention to make a liquid lens, it is better if the students are not too young. As to the younger students, it is wise to lend them objective lenses and collect them when the task is finished.
Keywords: Telescope, Kepler, Galilei, lens, image formation using lenses, focal-length.
Previous page: Observation in nature
Seuraava sivu: Light phenomena in the sky